
Posting good looking stand up video clips seems more and more important every day. You never know which one will go viral and help you get that booking or additional exposure. And the clips that seem to do best always have the captioned text at the bottom. I used to painstakingly go into iMovie or Final Cut X, add the text effect, type out 3-5 words at a time, adjust the length of time it was on screen so the timing worked, copy and paste the text effect, then edit the next 3-5 words and on and on. A single 90-second clip would take me up to an hour, and I’m quite good with technology.
So after I edited together a 3 camera shoot of my new comedy album and learned that in order to submit it to Amazon Prime Video, I had to get the whole thing closed captioned, my first words were, “No fucking way! I’m not captioning 71 minutes of text. I would rather nobody ever see it.” Then I calmed down and thought, “Who can I pay to do this?” I did some googling and asking around in real life, and eventually, a friend put me onto Rev.com which charges $1 per minute of video closed captioning and does a pretty accurate job with fast turn around (under 24 hours for short videos, 3- 4 days for long videos). You get an .srt file which you can upload to Amazon Prime / Youtube / Facebook video, etc.
Once that issue was solved, I decided to chop up my 71-minute special into short 1-2 minute clips to use for promo. I able to import the captioned .srt file into Final Cut X without issue but no amount of Googling was able to get me the answer of “How do I increase the font size of closed captions?” Apparently, that option doesn’t exist.
If you’re a comedian or content creator, Kapwing will save you tons of time and make you look more professional and polished while you do it.
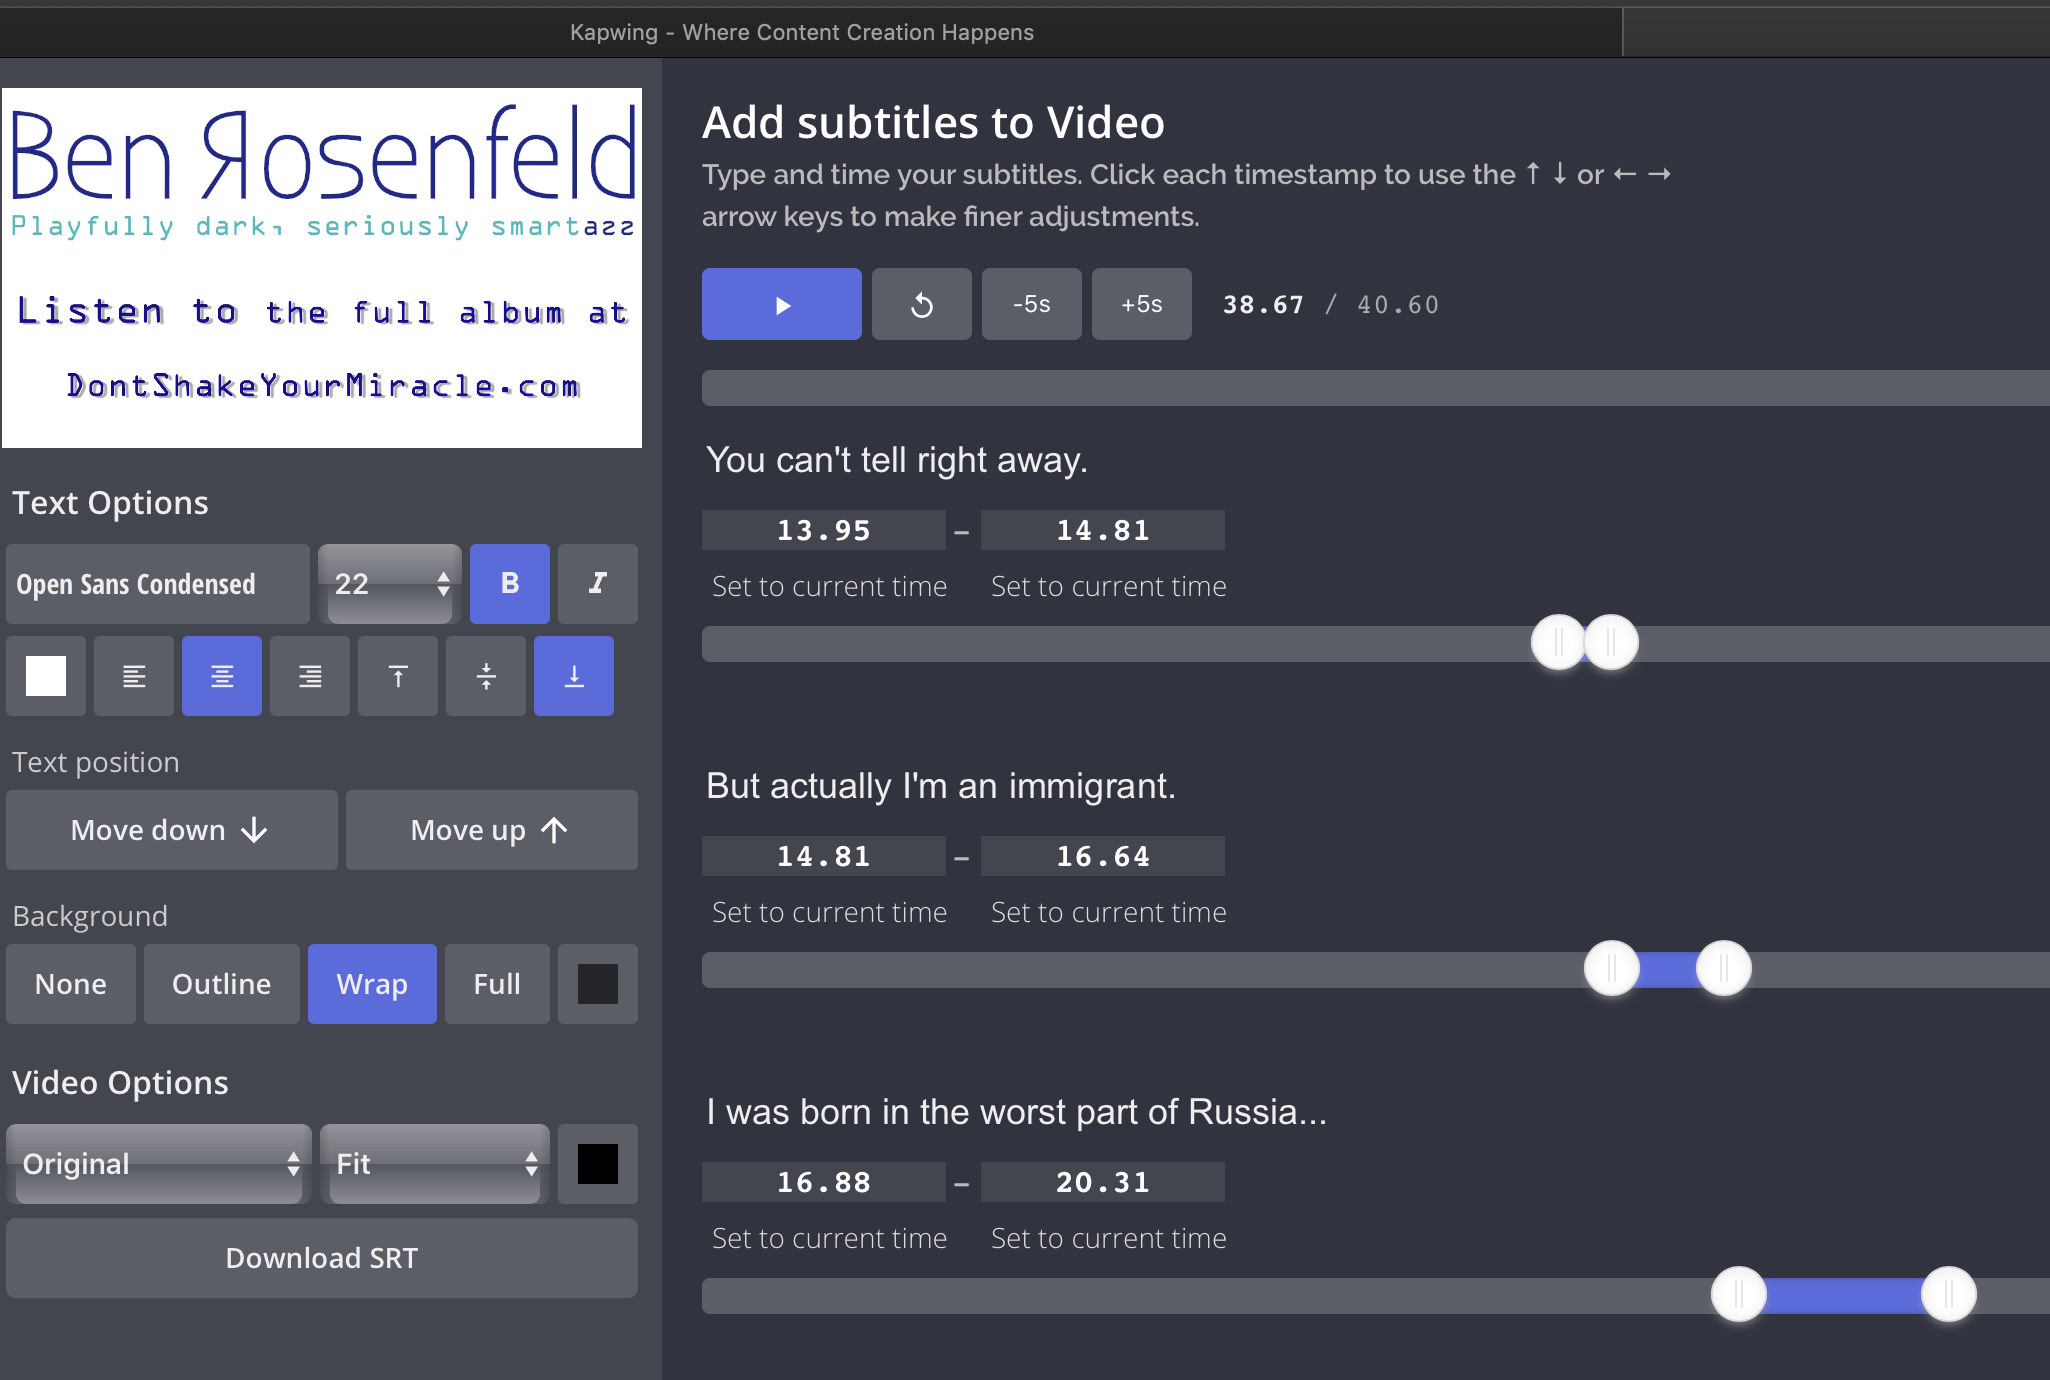
Check out how Kapwing Subtitler looks:
Upsides of Kapwing Subtitler:
- 95% of the features are free
- No watermarks!
- You have full control over the look and feel of your captions
- It lets you quickly resize videos for different platforms.
(God how I hate that every fucking social media platform has it’s own video guidelines. And why is IGTV video different dimensions than Instagram video? You suck Instagram! Okay, I’ll stop ranting. Sorry.) - There’s a lot of other useful-looking tools on their site that I’ve yet to play with
- $20/month feels reasonable for the pro features
- The auto caption generator is actually pretty accurate and fast (although it crashed the first 3 times I tried it, but I blame the Google Chrome incompatibility, see below). Had I learned about Kapwing sooner, perhaps I could’ve saved all the money I spent at Rev.com getting my .srt files
Downsides of Kapwing:
- It is not properly compatible with the Google Chrome browser on Mac OSX. I had an hour of work get wiped out because the video preview did not work properly. But once I loaded up Safari, everything worked much better.
- Tech support is slow to respond. I left a voicemail that hasn’t been returned for over 24 hours. Sure I called on a Monday of a three-day weekend, but who in Silicon Valley takes days off without having some overseas support staff in place? Especially for paying users. (I was so excited about how this was going to save me time, that I upgraded to the paid version within a half-hour of using it.)
- Once you complete your captioning, it takes a while to render longer videos before you can use them. For a 35 minute video, it takes 30-60 minutes before I can download the file. And then if I notice an issue and have to make a small change like just adjusting the background color, that whole process starts all over. For a 40 second video, the rendering process still took 10 minutes.
- Kapwing didn’t show up in my Google searches for “increasing caption text size.” It took a friend mentioning the site to me. Spend some money on Ad Words or PR or something to get it in front of people who have the pain point right now and are willing to give you money to solve it!
- They seem like a tiny company with few employees. I hope they stay in business for a long time. Or at least get bought out by a benevolent conglomerate.
- Their workspaces feature is confusing. I created a second workspace after my Google Chrome issues, just to have a clean slate and I couldn’t figure out why they kept trying to upsell me to a paid account when I already did that! Turns out, they charge you per workspace. That makes no sense. I’d think once it’s an upgraded pro account, what difference does it make how you separate your workspaces?
- I don’t see where I name each separate video. It seems like I can only rename once it’s in workspaces, and the workspace doesn’t list how long each video is, so I can’t tell what’s what very easily.
- Command+Z doesn’t work as a shortcut for edit->undo / I can’t find the undo button easily
Overall:
If you want to create cool looking captions for your videos, Kapwing Subtitler is the best tool around. (It’s also the only tool I found that has the amount of control and flexibility I want.)
*Disclosure – Kapwing offers bloggers a free pro account if they write a review about the software. I don’t think this influenced my review too much, but it’s always possible.